Exercise

workouts, science-based information, training, routines, exercise, movement, form

teen exercising hunting wellness blog scoliosis

A Little Curve, A Lot of Strength

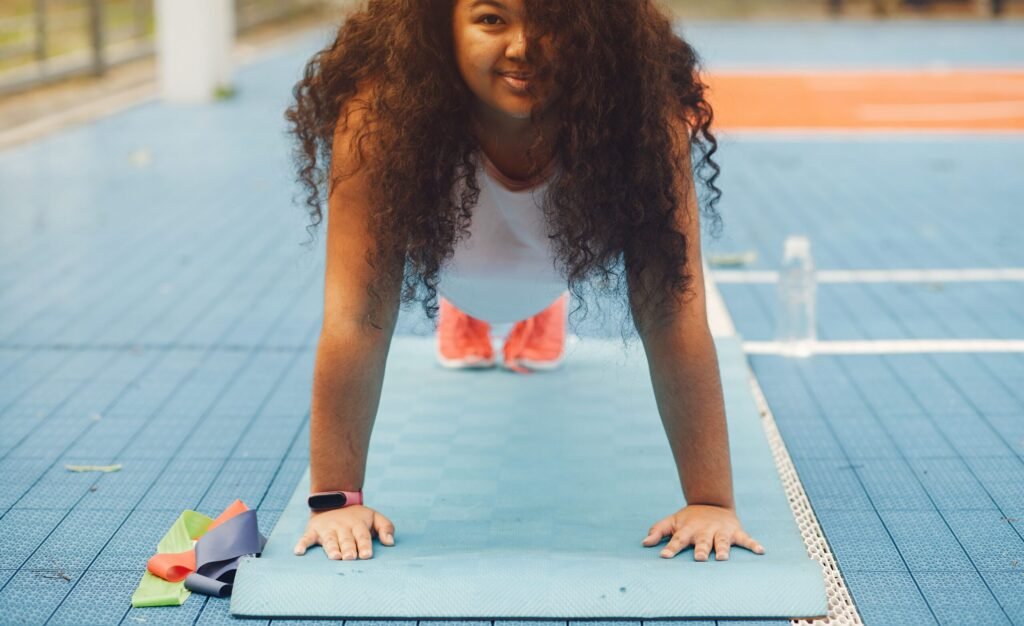
My Daughter Was Just Diagnosed With Mild Scoliosis: What I’m Learning as a Mom and Personal Trainer The diagnosis caught me off guard. As a personal trainer, I spend a lot of time talking about posture, movement, core strength, mobility, and taking care of your body. I work with people of all ages and have seen firsthand how much the body can adapt when we give it the right tools. So when my daughter was diagnosed with mild scoliosis, my first reaction was not as a trainer. It was as a mom. I worried. What caused it? Will it get worse? Will she have back pain? Will this affect her as an adult? Does she need to stop doing certain exercises? Could I have noticed it sooner? And then I did what I always tell my clients to do when something changes with their health: Get the facts before you panic. So, What Exactly Is Scoliosis? Scoliosis is a three-dimensional spinal condition in which the spine develops an abnormal sideways curvature, often creating a curve that looks somewhat like a “C” or “S.” A diagnosis of scoliosis generally means the spinal curve measures at least 10 degrees using the Cobb angle on an X-ray. When scoliosis develops during adolescence without another identifiable underlying cause, it is commonly called adolescent idiopathic scoliosis (AIS). And that word idiopathic is important. It basically means: We don’t know exactly why it happened. AIS is the most common form of scoliosis and typically occurs between the ages of 10 and 18. It can affect children who appear completely healthy and active, and many parents don’t discover it until adolescence. It is not necessarily something you caused. This is one of the first things I had to remind myself. Scoliosis is not simply the result of bad posture, carrying a heavy backpack, sitting too much, or not exercising enough. A heavy backpack isn’t considered a cause of scoliosis or something that makes the curvature worse. Researchers believe genetics and several biological factors may play a role, but there isn’t one simple explanation for why one teenager develops scoliosis while another doesn’t. That uncertainty can be frustrating for parents. But it also means we shouldn’t blame ourselves. Why Adolescence Matters So Much. One of the biggest reasons scoliosis is monitored carefully during adolescence is growth. The teenage years can bring incredibly rapid changes to the skeleton. During periods of rapid growth, an existing spinal curve can progress. Once a child reaches skeletal maturity, the risk of significant progression generally decreases substantially. However, larger curves—particularly curves over about 60 degrees—can continue to progress during adulthood. That’s why the number on the X-ray isn’t the only thing doctors consider. They also look at things such as: How large the curve is Where the curve is located Whether there are one or multiple curves How much skeletal growth remains How quickly the curve is changing The child’s overall development In other words, a mild curve in a teenager isn’t automatically a lifelong problem. But it does deserve attention. What Happens If Mild Scoliosis Is Found? This is where I think parents can easily become frightened unnecessarily. Hearing the word scoliosis can make you immediately think: Brace. Surgery. Spinal fusion. But that’s not the reality for every child. For smaller curves, doctors may simply recommend observation and periodic X-rays to determine whether the curve is changing as the child grows. The Scoliosis Research Society generally describes observation as appropriate for curves below approximately 25–30 degrees, depending on the individual situation. For some adolescents who are still growing and have larger curves, bracing may be recommended to reduce the risk of progression. Surgery is generally reserved for substantially larger curves or situations where there is a high risk of continued progression. So a diagnosis does not automatically mean that a teenager is headed for surgery. That distinction matters. Can Exercise Fix Scoliosis? Here’s where I want to be especially careful as a personal trainer. Exercise is valuable. But exercise should not be marketed as a magic cure for scoliosis. There is a difference between: Managing and supporting the bodyandstructurally correcting the spinal curve. Exercise can help an adolescent develop strength, coordination, balance, mobility, body awareness, and confidence. Physical activity is generally encouraged for children with scoliosis unless they have pain or their medical team has given them specific restrictions. The Scoliosis Research Society specifically notes that keeping the trunk strong is beneficial. But I am not going to tell my daughter that a few exercises will magically straighten her spine. That would be irresponsible. Instead, my goal is to help her build a strong, capable body around the spine she has. What I Plan to Do as Her Mom and Personal Trainer This is where my professional experience becomes useful—but also where I have to know my limits. I am her mom first. I’m not her scoliosis specialist. I want her care to be guided by her physician and, if recommended, a physical therapist who understands adolescent scoliosis. My role is to support that plan. 1. Build overall strength Strength training isn’t something I want her to fear because she has scoliosis. Quite the opposite. I want her to learn how to safely become strong. That may include appropriately selected movements involving: Squats and squat variations Hip-dominant movements Glute strengthening Core stabilization Upper-body pulling and pushing Carrying exercises when appropriate Balance and coordination General functional movement The exact exercises will depend on her individual curve, symptoms, movement patterns, medical recommendations, and physical maturity. There is no universal “scoliosis workout.” And anyone selling one probably needs to put the megaphone down. 2. Focus on core control—not endless crunches When I say “core,” I don’t mean doing 100 sit-ups. The core is much more than the abdominal muscles. I want to help her develop the ability to control her trunk while she moves her arms and legs. That can include exercises such as appropriately modified: Dead bugs Bird dogs Planks Side planks Anti-rotation exercises

A Little Curve, A Lot of Strength Read More »

Exercise, Wellness
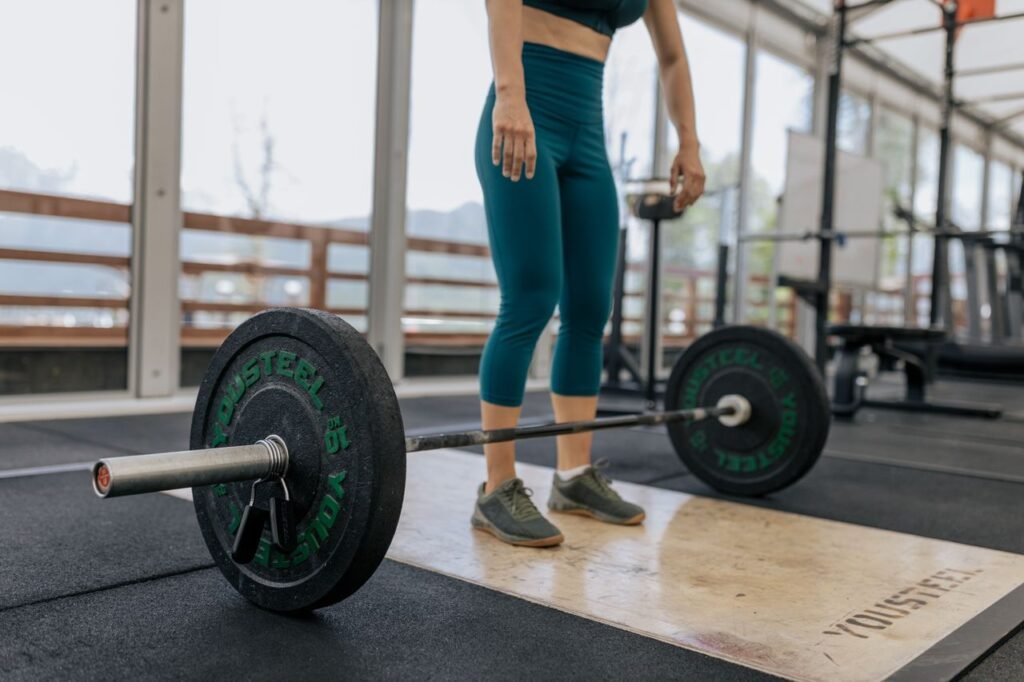
Female athlete preparing to lift a heavy barbell in a gym, showcasing fitness and strength.

Know Your Gym Tools: The Barbell

There’s something about the barbell area of the gym that can feel intimidating. Maybe it’s the clanging plates, the squat racks lined up against the wall, or the lifters who seem to know exactly what they’re doing. For many beginners, the barbell section can feel like a place reserved for “serious” gym-goers. I get it. I’ve been there too. The truth is, the barbell isn’t just for powerlifters, athletes, or the strongest person in the gym. It’s one of the most versatile and effective training tools ever created, and learning how to use it can completely change the way you approach strength training. My goal with this series is to help you understand the equipment around you so that the gym feels less intimidating and a lot more welcoming. The barbell is one of the most powerful tools in strength training — and also one of the most intimidating for beginners. If you’ve ever thought barbells were only for advanced lifters or powerlifters, this guide will show you what they are, how they work, and why beginners should learn them early. Because confidence in the gym starts with understanding. What Is a Barbell? I still remember how intimidating the barbell area felt when I first started going to the gym. There was something about the racks, the plates, and the people lifting heavy weights that made it seem like I wasn’t experienced enough to be there. But the truth is, a barbell is simply a long metal bar designed to hold weight plates, and it’s one of the most effective tools for building strength. What I love about barbells is that they grow with you. Whether you’re learning your very first deadlift with an empty bar or adding weight as you get stronger, the barbell adapts to your fitness level. It allows you to train fundamental movements like squats, presses, rows, and deadlifts while teaching your body to move with strength, balance, and coordination. Once you realize that the barbell isn’t reserved for the strongest people in the gym, but is actually a tool for anyone willing to learn, it becomes a lot less intimidating and a lot more empowering.  The brief history of the Barbell The barbell has been around for more than a century. Early versions appeared in the late 1800s and looked very different from the sleek steel bars we use today. Some of the first barbells had hollow globes attached to each end that could be filled with sand or shot to change the weight. Strongmen used them in traveling shows and competitions to demonstrate incredible feats of strength. As the fitness industry evolved, so did the barbell. Manufacturers standardized the size, weight, and design, creating the barbells we see in gyms today. Despite all the new fitness trends and high-tech machines, the barbell has remained one of the most effective tools for building strength, muscle, and confidence. Why Beginners Should Learn the Barbell I know what some of you are thinking: “That thing weighs forty-five pounds before I even add plates!” And yes, the standard Olympic barbell weighs 45 pounds (20 kilograms). That can feel heavy at first, but here’s something important to remember: starting light is not a sign of weakness. Learning proper technique is what sets you up for long-term success. What I love about barbells is that they teach your body to move as one connected system. Instead of isolating a single muscle, barbell exercises challenge your legs, core, back, and upper body to work together. They teach balance, coordination, and strength in a way that few other pieces of equipment can. More importantly, they teach confidence. There’s something incredibly empowering about walking into the gym, setting up your bar, and realizing, “I know how to do this.” Not all Barbells are the same One of the biggest surprises for many beginners is learning that there isn’t just one type of barbell. The most common is the Olympic barbell, which weighs 45 pounds and is used for exercises like squats, deadlifts, bench presses, and overhead presses. Many gyms also have a women’s Olympic barbell, which weighs 33 pounds (15 kilograms) and has a slightly smaller diameter, making it easier to grip  for people with smaller hands. If you’re just starting out, your gym may also have technique bars, which weigh anywhere from 5 to 15 pounds. These bars are fantastic for practicing movement patterns without worrying about the weight. Then there are the specialty bars. The EZ curl bar, with its zigzag shape, is commonly used for arm exercises because it puts less stress on the wrists. The trap bar, or hex bar, allows you to stand inside it and often feels more comfortable for deadlifts. The safety squat bar, recognizable by its padded shoulder supports and handles, helps people squat with less strain on their shoulders. Using a lighter bar or a different bar isn’t cheating—it’s simply choosing the right tool for the job. Where to Find Barbells in the Gym If you’re not sure where the barbells are, don’t worry—you’re definitely not the only one. In most gyms, you’ll find them near the squat racks, power cages, bench press stations, and deadlift platforms. The first time you walk into that area, it can feel like everyone knows some secret set of rules. Here’s the truth: they don’t. Every experienced lifter started exactly where you are now, wondering which rack to use and whether they were setting things up correctly. Don’t be afraid to ask questions. That’s how confidence is built. The Five Basic Movement Patterns One of the reasons barbells are so effective is that they can train all five foundational movement patterns. The hinge pattern includes exercises like deadlifts and Romanian deadlifts, which strengthen your glutes and hamstrings. The squat pattern includes back squats and front squats, helping you build lower-body strength and stability. For the push pattern, exercises like the bench press and overhead press develop upper-body power. The pull pattern, including bent-over rows, strengthens your back

Know Your Gym Tools: The Barbell Read More »

Exercise
woman, runner, sport, running, run, exercise, athlete, race, marathon, active, competition, sprint, runner, runner, runner, runner, runner, marathon, marathon, sprint

Train like an Athlete, not a Bodybuilder: A smarter way to lose weight

The other day I was scrolling through fitness content when I came across a phrase that immediately caught my attention:   “Train like an athlete, not a bodybuilder if you want to lose weight.”   Now, as a personal trainer who has spent years emphasizing strength training and building muscle, I found myself raising an eyebrow. Wait a minute. Haven’t we been telling people for years that building muscle is one of the best things you can do for fat loss? My own transformation journey involved strength training. I lost over 100 pounds, and lifting weights played a huge role in helping me build confidence, preserve muscle, and completely change my relationship with exercise. So naturally, I became curious. Was this just another catchy social media slogan? Or was there actually some science behind it? As any fitness nerd would do, I went down the research rabbit hole. What I discovered The first thing I learned is that the phrase itself can be a little misleading. The truth is that both bodybuilding-style training and athletic-style training can help with weight loss. The difference lies in what each style prioritizes. Bodybuilding focuses on developing individual muscles, maximizing muscle growth, and improving aesthetics. Athletic training focuses on movement, performance, power, conditioning, coordination, and overall physical capability. Think about it this way. A bodybuilder may ask: “How can I grow my quads?” An athlete may ask: “How can I run faster, jump higher, and move more efficiently?” Both are training hard. They’re simply training for different outcomes. What the Science says Research consistently shows that resistance training is extremely effective for preserving muscle during weight loss. This matters because when people lose weight through dieting alone, they often lose both fat and muscle. Muscle is metabolically active tissue and helps maintain strength, function, and overall body composition. But research also shows that higher levels of daily movement, conditioning work, and cardiovascular fitness are associated with greater calorie expenditure and improved long-term weight management. In other words: Building muscle is important. Moving more is important. Improving fitness is important. The most successful fat loss programs often combine all three. What intrigued me most was that athletic training naturally blends strength, conditioning, balance, mobility, and endurance into one package. You aren’t just training your muscles. You’re training your body. Moving more is important. Improving fitness is important. The most successful fat loss programs often combine all three. What intrigued me most was that athletic training naturally blends strength, conditioning, balance, mobility, and endurance into one package. You aren’t just training your muscles. You’re training your body. Bodybuilder vs Athlete: A Real-Life Example Imagine two workouts: Bodybuilder Workout Leg Press Leg Extension Hamstring Curl Calf Raises Seated Hip Abduction Nothing wrong with this workout. You’ll feel the burn. Your muscles will be challenged. You may build significant muscle over time.  Now compare the athlete’s workout Athlete Workout Goblet Squats Walking Lunges Farmer Carries Sled Pushes Kettlebell Swings Suddenly you’re using your entire body. Your heart rate climbs. Your core works harder. You’re producing force, controlling movement, and building fitness all at once. This is where athletic-style training becomes very appealing for weight loss. Sample Bodybuilding Routine If your goal is muscle growth and aesthetics: Lower Body Day Leg Press – 4 x 10 Leg Extension – 3 x 12 Romanian Deadlift – 4 x 10 Hamstring Curl – 3 x 12 Walking Lunges – 3 x 12 each leg Standing Calf Raise – 4 x 15 Rest 60–90 seconds between sets. Focus on muscle fatigue and progressive overload. Sample Athletic Routine If your goal is fat loss, conditioning, and overall fitness:   Athletic Circuit Perform 3-4 rounds. Goblet Squats – 10 reps Farmer Carry – 40 yards Push-Ups – 10 reps Walking Lunges – 20 steps Kettlebell Swings – 15 reps Battle Ropes – 30 seconds Rest 90 seconds between rounds. This type of workout challenges strength, endurance, cardiovascular fitness, coordination, and work capacity. You’ll likely be breathing much harder by the end. Here’s my conclusion after doing the research. Neither. And both. I know that’s not the sexy social media answer. But the reality is that your body doesn’t know whether you’re training like a bodybuilder or an athlete. It responds to stimulus. Bodybuilding is excellent for building muscle. Athletic training is excellent for improving movement and fitness. For most everyday people trying to lose weight, feel stronger, move better, and stay healthy as they age, a blend of both approaches may be the sweet spot. Build muscle. Challenge your heart. Move in multiple directions. Carry things. Lift things. Push things. Walk often. Repeat. My Takeaway As someone who spent years focused primarily on strength training, this topic reminded me that fitness isn’t just about how much weight we can lift. It’s about what our bodies can do. Can we climb stairs without getting winded? Can we carry groceries without our backs hurting? Can we play with our kids or grandkids without feeling exhausted? Can we move confidently through life?   Building muscle absolutely matters. But so does movement. So while I’m not giving up my dumbbells anytime soon, I’ve started incorporating more athletic-style training into my workouts. And honestly? It’s been fun. Because at the end of the day, fitness shouldn’t just help us look better. It should help us live better. Here’s my challenge to you: For the next 2 weeks, add one athletic-style workout to your routine. Keep lifting if you enjoy it, but focus on movements that make you squat, carry, push, pull, and move. Then ask yourself: Do I feel stronger? Do I have more energy? Am I moving through daily life with less effort? Weight loss is great. But feeling capable is even better. If you’re ready to build a body that looks good, moves well, and lasts, I’d love to help. Send me a message or contact me here and I’ll help you put together a simple athletic-style plan that fits your schedule and experience level. Contact me

Train like an Athlete, not a Bodybuilder: A smarter way to lose weight Read More »

Exercise

Know Your Gym Tools: The Kettlebell

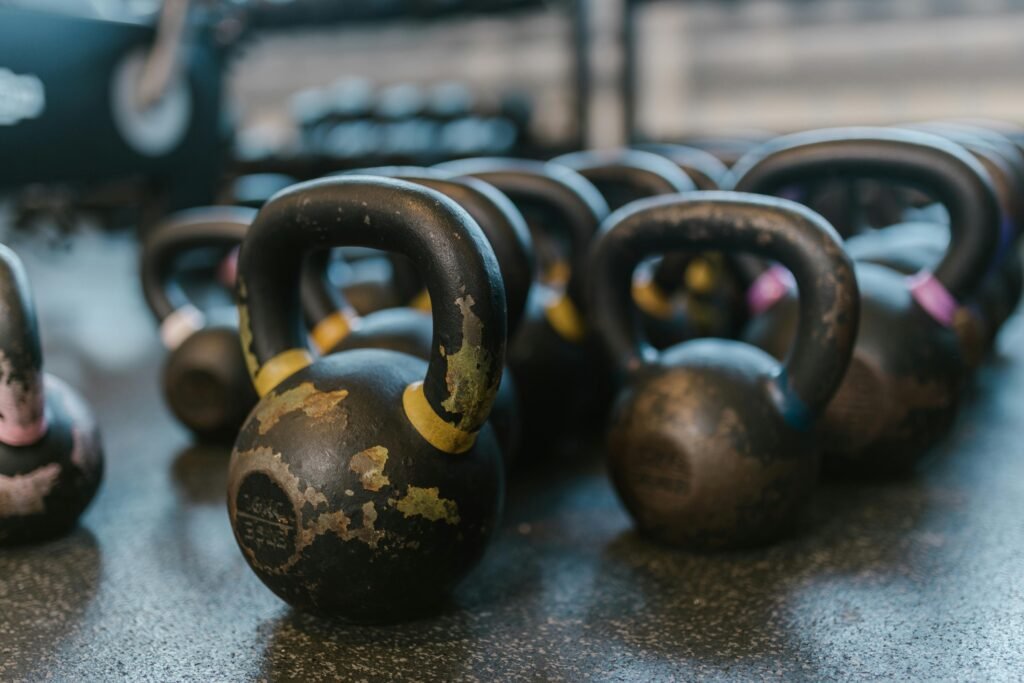
(Beginner’s Guide to Strength, Confidence, and Results) Walk into any gym, and you’ll probably see them sitting in a corner, heavy, round, and slightly intimidating. The kettlebell is one of the most powerful and misunderstood tools in the gym. If you’ve ever wondered what it does, how to use it, or whether it’s “for you,” this guide will show you everything you need to know to use kettlebells safely and confidently. Understanding is the first step towards gaining confidence in the gym. https://www.youtube.com/shorts/0hUYhfu4ohc What Is a Kettlebell? A kettlebell is a cast-iron or steel weight with a handle. Unlike dumbbells, the weight sits below the handle, creating an offset center of gravity. That simple design forces your body to stabilize more, engage your core, and move more naturally. This makes kettlebells incredibly effective for building: Strength Stability Coordination Endurance Functional, real-life movement You don’t need to lift heavy to benefit. Proper technique is what delivers results. The Origin of the Kettlebell The kettlebell traces its roots back to 18th-century Russia, where it was originally used as a counterweight for weighing grain in markets. These cast-iron weights, known as “girya,” were common tools for farmers and merchants. Over time, people began lifting and swinging them to demonstrate strength and physical ability, turning a simple measuring device into a training tool. By the 19th century, kettlebells had become part of physical conditioning programs for athletes and the military in Russia. In other words, kettlebells were accidental strength training. Today, they’re widely used in strength programs, functional training, and competitive fitness environments like CrossFit Games, but they remain one of the best tools for beginners. Why Kettlebells Are Great for Beginners Kettlebells teach your body to move as a unit instead of isolating muscles one at a time. They improve: Core stability Grip strength Posture Balance and coordination Total-body strength Unlike machines that guide your movement, kettlebells teach your body how to control movement—which transfers directly to everyday activities. They’re simple, efficient, and highly effective. What Makes Kettlebells Different From Dumbbells What truly sets kettlebells apart from dumbbells is the offset center of gravity. With a kettlebell, the weight sits below the handle rather than evenly balanced in your hands. This small design difference changes how your body works during each movement. Because the load is positioned away from your hands, kettlebells require more core engagement, challenge your stability, and encourage better coordination throughout the entire body. They also allow for more fluid, dynamic movements, like swings and cleans, that are difficult to replicate with dumbbells. While dumbbells tend to feel more controlled and predictable, kettlebells require greater body awareness and control, making them an excellent tool for developing strength, balance, and movement quality. How Kettlebells Train the 5 Fundamental Movement Patterns https://www.youtube.com/shorts/_eOFaLkon28 A single kettlebell can train your entire body by targeting the five primary movement patterns. 1. Hinge Examples: Deadlifts, swings Builds glutes and hamstrings Teaches proper hip movement Protects the lower back when done correctly 2. Squat Example: Goblet squat Improves posture and depth Strengthens legs and core Beginner-friendly positioning 3. Push Examples: Overhead press, floor press Builds shoulder strength Improves stability and control   4. Pull Examples: Rows, high pulls Strengthens upper back Improves posture 5. Carry Examples: Suitcase carry, front rack carry Develops core strength and grip Enhances balance and stability One tool. Full-body training. Kettlebells may look simple, but they’re one of the most versatile and effective tools you’ll find in the gym. Whether you’re learning the basics of strength training or looking to improve stability, coordination, and full-body power, kettlebells can help you build a strong foundation. You don’t need to master every movement right away or lift heavy to benefit. Start with the fundamentals, focus on good technique, and give yourself time to learn. The more familiar you become with the tools around you, the more confident you’ll feel walking into the gym—and that confidence is where real progress begins.  If you’re ready to start training but aren’t sure where to begin, I’m here to help. Whether you want guidance on proper form, building a beginner-friendly workout routine, or simply gaining more confidence in the gym, feel free to reach out. I offer personal training and support designed to help you learn the fundamentals, train safely, and feel stronger every step of the way. You can contact me using the information below to ask questions or schedule a session—I’d be happy to help you get started. Contact me

Know Your Gym Tools: The Kettlebell Read More »

Exercise

Jump Training: What is it and why you should do it (especially if you’re a woman in menopause)?

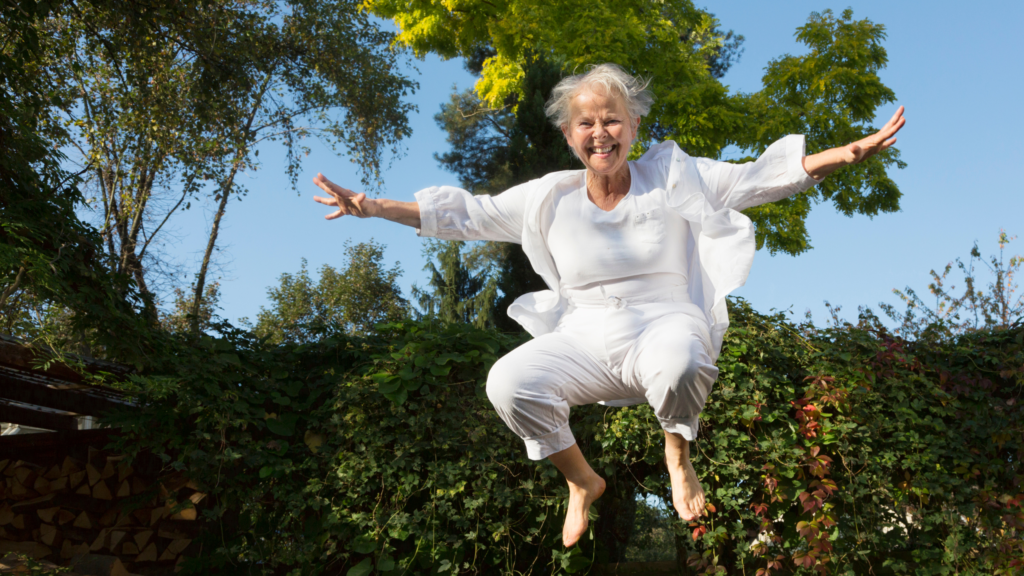
What happens to our bones as we age ? As we age, our bones slowly begin to lose density because the natural balance between bone breakdown and bone formation shifts—around midlife, especially after the age of about 50, bone resorption (breakdown) starts to outpace bone formation. Hopkins Medicine+2Bone Health & Osteoporosis Foundation+2 For women in particular, the transition through Menopause accelerates this loss sharply: with the decline in estrogen, women may lose on the order of 1.8-2.3% of bone mineral density per year at the spine and about 1-1.4% per year at the hip during the 5-10 years surrounding menopause. Menopause Facts+2UCLA Health+2 In fact, women can lose up to 10–12 % of bone density in the hip and spine across the menopausal transition and as much as 20 % or more in the first five to seven years following menopause. UCLA Health+3Bone Health & Osteoporosis Foundation+3Better Health Channel+3 Over the longer span of life, by age 80, women on average have lost about 30% of their peak bone mass. Australasian Menopause Society That means weaker structure, thinner bone walls, and larger internal “honeycombs” in the bone—all combining to raise the risk of osteopenia, then osteoporosis, and fractures. National Council on Aging+1 Understanding these numbers underscores why training the skeleton (heavy lifting, high-impact jumps, sprinting) and nutrition matter, especially for women in midlife. What you can do to help bone density—jump training One of the most effective and surprisingly simple ways to protect and even rebuild bone density is through jump training. Our bones respond to stress, and the impact from jumping sends a signal to your body to strengthen and fortify the skeletal structure. This process, called mechanical loading, stimulates bone-forming cells (osteoblasts) to increase bone mineral density, particularly in the hips and spine, the areas most vulnerable to age-related loss. Research shows that short bouts of high-impact exercise, such as 10 minutes of jumping three times per week, can significantly improve bone density, even in women with osteopenia.  You don’t need to perform extreme plyometrics; simple hops, jump squats, or small bounding movements on a firm surface are enough to get results. The key is consistency and progression. Start with gentle impact and gradually increase intensity as your strength and confidence grow. Over time, these small but powerful sessions can help you maintain strong, resilient bones that support you for decades. What happens to bones when continued stress is administered? Bones respond by becoming stronger and denser through a process known as bone remodeling. This process is guided by Wolff’s Law, which states that bone tissue adapts to the loads under which it is placed.  The mechanical stress stimulates specialized cells called osteocytes, which then signal osteoblasts (bone-building cells) to lay down new bone matrix and osteoclasts to resorb older or weaker bone tissue.  Over time, this coordinated activity increases bone mineral density and improves structural strength. Studies published in journals like Bone and the Journal of Applied Physiology have shown that regular high-impact or resistance exercise can increase bone density by 1–3% annually in adults, a meaningful gain, especially when offsetting the typical age-related loss. In essence, consistent mechanical stress teaches your bones to stay strong, functional, and fracture-resistant well into later life. Jump training can be incredibly beneficial, but it’s not suitable for everyone at least not right away. Here’s who should avoid or modify jump training until properly cleared or conditioned. People with joint pain or arthritis flare-ups: High-impact movements can aggravate knees, hips, or ankles that are already inflamed or unstable. Those with osteoporosis or severe osteopenia: While impact can improve bone density, jumping without proper supervision or foundational strength can increase fracture risk. Anyone recovering from injury or surgery: Especially if it involves the lower body, spine, or core — you need full strength, stability, and clearance from a medical professional first. Individuals with balance or coordination issues: Falls during jump training can cause more harm than good; stability work should come first. Beginners without strength training experience: Jumping should build on a foundation of strength — think of it as “level 2,” after you can squat, hinge, and land safely. In short: jump training is powerful when done right, but it should be progressive, controlled, and tailored to your current ability. For many people, that means starting with low-impact drills, learning proper landing mechanics, and building from there. Let’s work together ! As a Certified Personal Trainer, I can help you safely integrate jump training into your fitness plan, customizing the intensity, frequency, and type of movement to suit your current fitness level and goals. Whether you’re starting from scratch or looking to build on your existing routine, I’ll guide you through proper form, progression, and recovery to maximize benefits while minimizing risk. A few minutes of intentional, high-impact work each week can make a remarkable difference in your long-term strength, stability, and vitality. Your bones thrive on challenge.  Let’s build that strength together. Get Started

Jump Training: What is it and why you should do it (especially if you’re a woman in menopause)? Read More »

Exercise, Wellness

The Romanian Deadlift

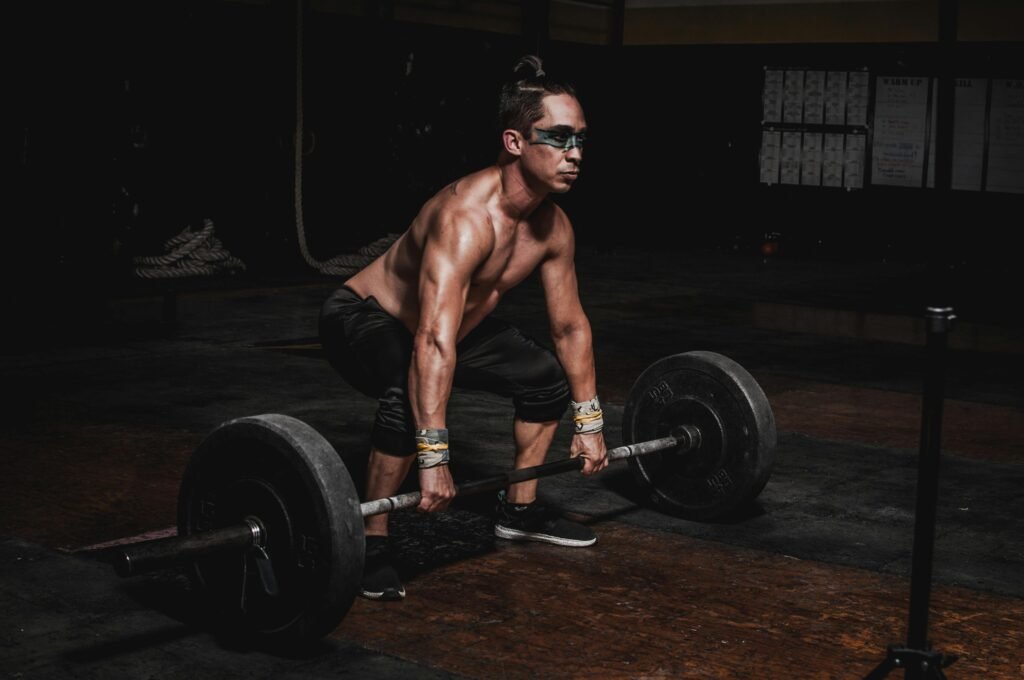
The Glorious, Slightly Theatrical History of the Romanian Deadlift. Once upon a gym in a time before Instagram clips of people pretending to “hip hinge,” a modest, efficient lift slithered out of Olympic weightlifting warm-ups and quietly changed the way humans moved heavy things. That lift is the Romanian deadlift, the RDL (my favorite of lifts): the hip hinge’s classy cousin who wears a tailored singlet and actually knows how to use its hamstrings. How it started (and why it’s named after Romania) The Romanian deadlift didn’t arrive with fanfare, neon lights, or a motivational playlist. It arrived with Nicu Vlad, an Olympic-weightlifting wizard from Romania, and his coach, Dragomir Cioroslan. In 1990, Nicu Vlad was training in the United States, either at the Olympic Training Center or at San Francisco’s famed Sports Palace gym (accounts vary). While preparing for the clean and jerk, he introduced a variation of the deadlift. Unlike the traditional version, which begins with the bar on the floor, Vlad started from a standing position and emphasized the eccentric, or lowering, phase of the lift. Vlad used a flat-backed, semi-stiff-legged pulling pattern as an accessory to make his clean stronger and his back resilient.  This technique kept a slight bend in the knees, a rigid, flat back, and a deep hip hinge. He lowered the bar to around mid-shin before driving back up to the start, maintaining constant muscle tension throughout. The purpose was clear: to build strength in the hamstrings and the entire posterior chain, key players in generating the explosive pulling power essential to Olympic lifting. Vlad Nicu During this coaching clinic, as the lift was demonstrated, folks took notes, Jim Schmitz (an American coach at the clinic) apparently asked what to call it, and someone said “Romanian deadlift.” The name stuck not because it’s mysterious or regal, but because it was practical and very, very effective. What the Romanian deadlift actually is (so you can stop pretending) https://www.youtube.com/watch?v=2bmuYtv4HbQ You do not “bend over and yank.” You hinge: push the hips back, keep the spine long, let the hamstrings whisper sweet tension into your legs, then stand tall by squeezing the glutes and locking the hips.  Compared to a conventional deadlift, the RDL usually starts at the top (you lower the bar from the rack or after a light descent) and emphasizes eccentric control and hamstring length under load.  It’s an accessory that builds the posterior chain like a small, benevolent machine that hands out single-serving packets of athleticism. Evolution and varieties — the deadlift family tree The deadlift universe is vast and dramatic. The Romanian deadlift sits on a plush but practical branch. Here’s the family reunion: Romanian Deadlift (RDL): Hip hinge, modest knee bend, big hamstrings, and back control. Great for posture, posterior-chain hypertrophy, and training the hinge without grinding out max pulls. Stiff-Legged Deadlift: Similar to the RDL but with less knee bend and more lumbar stretch. Dangerous if you treat it like a flexibility contest. Conventional Deadlift: Floor start, more knee bend, big quad-and-glute contribution. The classic heavy-lift test. Sumo Deadlift: Wider stance, more upright torso, shorter pull. Loved by lifters who enjoy tactical foot placement. Trap-Bar Deadlift: Pull from inside a hex bar — easier on the back, hip-dominant without as much lower-back torque. Snatch-Grip / Deficit / Rack Pulls: Variations that change range of motion, leverage, and weak points. All exist to make you better at some part of the lift (or to make your ego take a walk). Over the years, coaches borrowed cues from Olympic lifting, powerlifting, strongman, and even yoga. The RDL was quietly adopted by bodybuilders for hamstrings, by powerlifters for lockout strength, by athletes for hinge mechanics, and by Sunday lifters who wanted to show that they had a “posterior chain.” Progression has been practical: lighter, controlled reps for hypertrophy; heavier, tighter sets for strength and carryover to big pulls. Trapbar Deadlift World records? Yes. And they’re a spectacle. If you’re asking “who has lifted the heaviest deadlifts ever?” strap in — these are feats of human showmanship, science, and stubborn fascination with the question “what if we put everything on the bar?” The modern all-time men’s deadlift world record has been pushed into the half-ton club and beyond by strongmen who pull in suits, straps, on different bars (elephant bar, thick handles), and in both sanctioned competitions and exhibition attempts. Recently, Hafþór Júlíus Björnsson — yes, the Icelandic giant sometimes known as “The Mountain” — has been rewriting the record books with staggering pulls, including official competition lifts in the 500+ kg range. (There’s history here: previous milestones included Eddie Hall’s 500 kg, Andy Bolton’s equipped records, and more.) These lifts are part raw strength, part event setup, and part a very public negotiation with gravity. “The Mountain” Hafþór Júlíus Björnsson Lucy Underdown Women are absolutely deadlifters — make no mistake. The women’s deadlift has exploded in recent years as strongwomen and powerlifters push boundaries. Lucy Underdown (a standout in strongwoman circles) has repeatedly raised the bar for women’s deadlifting with world-record pulls in the 300+ kg range in strongwoman events (elephant bar and conventional arenas), while historic powerlifting names like Becca Swanson set massive equipped deadlifts years ago that still inspire debate and admiration. The point is: women lift heavy, break records, and make the rest of us reconsider our life choices mid-workout. Why you should care (benefits that aren’t just for flexing) The RDL and deadlifts in general are more than Instagram moments — they are movement patterns with huge carryover: Strength and hypertrophy: RDLs load the hamstrings, glutes, and spinal erectors in a way squats don’t, improving posterior-chain mass and strength.  Injury prevention: A well-trained hinge reduces lower-back injuries by teaching the hamstrings and glutes to do the work instead of the lumbar spine. Improved athleticism: Sprinting, jumping, and changing direction all require a powerful hip hinge. RDLs build the spring. Better posture and lumbar control: Eccentric control in the RDL strengthens the back through the range you need to resist

The Romanian Deadlift Read More »

Exercise
Scroll to Top